언리얼 엔진 5.5 버전으로 생성한 프로젝트 기준으로, 3인칭 템플릿으로 프로젝트를 생성하면, 기본적으로 제공하는 캐릭터와 게임모드 c++ 클래스가 있을 것이다.
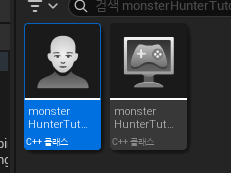
이번에는 이 녀석들을 한번 분석해보려고 한다.
먼저 헤더 파일을 보면, GENERATED_BODY()와 그 밑에 UPROPERTY로 변수들이 정의되어 있다.
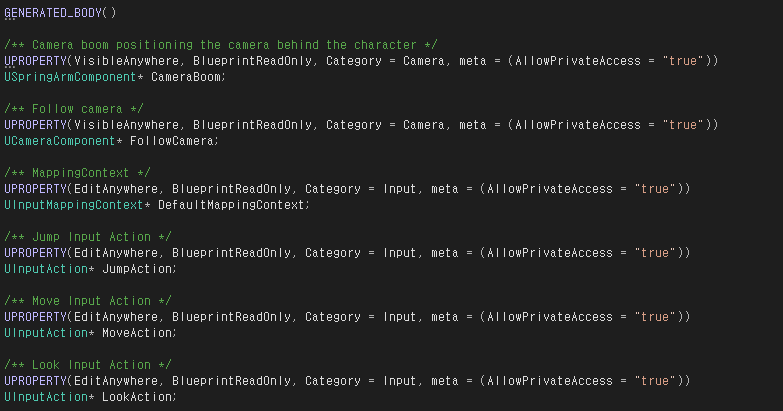
CameraBoom은 스프링 암 컴포넌트, FollowCamera는 카메라 컴포넌트인데, 스프링 암 컴포넌트는 캐릭터에서 빼놓을 수 없는 요소인 카메라를 캐릭터에게서 일정 위치에 유지하도록 하고, 카메라 컴포넌트는 말 그대로 시점을 보여주는 카메라이다.
이 c++클래스에서는 스프링 암과 카메라를 해당 클래스를 기반으로 하는 블루프린트에 자동으로 배치하도록 하고 있는데, cpp 파일을 보면 이 클래스를 init하는 부분에서 CameraBoom과 FollowCamera에 SetupAttachment를 통해 해당 과정을 진행한다.
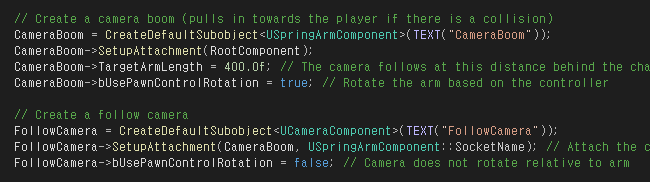
이렇게 했을 때의 장점은 굳이 일일히 이 컴포넌트들을 에디터에서 배치하지 않아도 된다는 점이다. SubObject를 생성하고, SetupAttachment로 배치하고, 주요 값들을 미리 설정해 줄 수 있다.
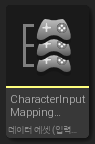
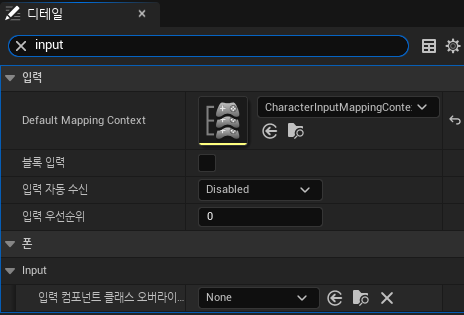
다음은 Input 관련인데, UInputMappingContext는 데이터 에셋 중 아래와 같은 종류의 입력 매핑 컨텍스트이다.
이건 어떤 키가 어떤 액션을 발생시키는지를 묶어놓은 데이터 에셋이라고 생각하면 된다. 입력 매핑 컨텍스트 에셋을 생성하여 사용하면 된다.
UInputAction은 입력에 대한 동작을 나타내는 클래스이다. 점프나 이동, 시점회전 같은 행동이다. 입력 액션을 생성하여 사용하면 된다.
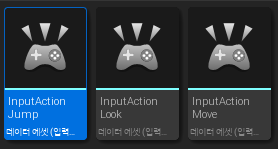
얘네들은 UPROPERTY 매크로로 정의되었고, EditAnywhere을 붙여놨기 때문에 이 c++ 클래스를 통해 캐릭터 블루프린트를 생성하면 에디터에서 해당 프로퍼티를 찾아서 에셋을 넣어주어야 한다.

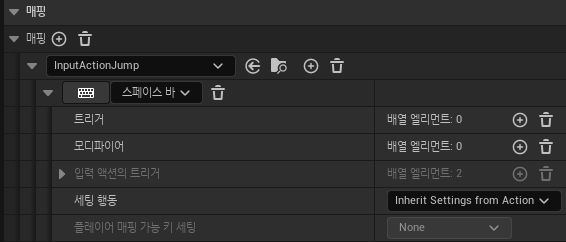
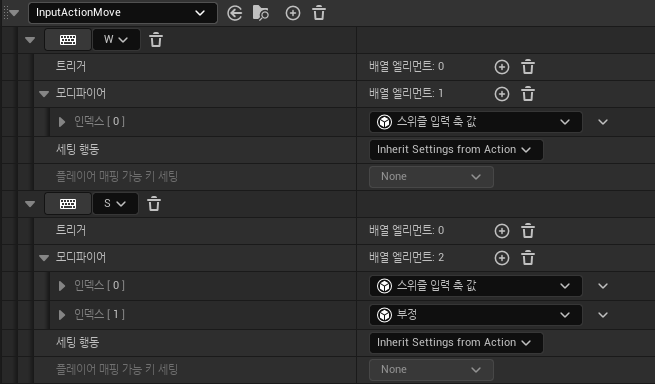
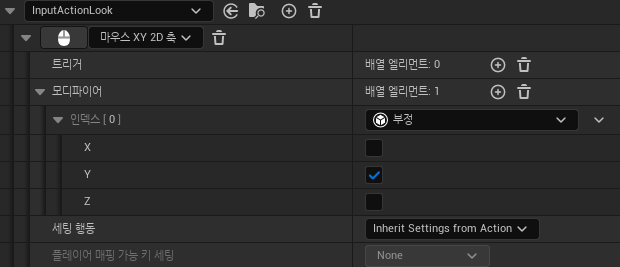
해당 BP 에셋들도 직접 설정해주어야 한다. (3인칭 템플릿으로 생성하면 BP_ThirdPerson.. 이 캐릭터 블루프린트가 있어서 저 에셋들도 다 있긴 함.) Jump Action같은 경우에는 트리거를 눌림, 해제됨 두가지로 설정하고, Move Action과 Look Action은 값 타입을 Axis2D로 설정해주자.
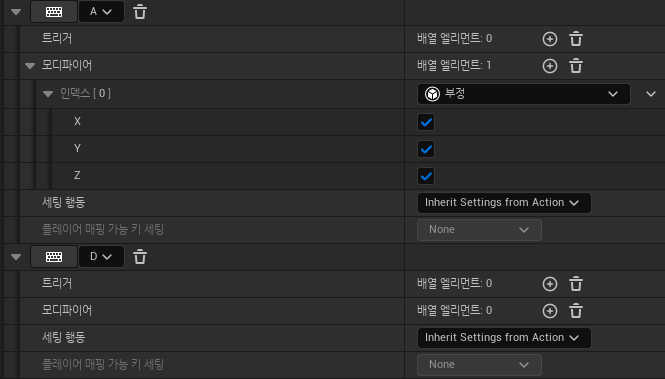
입력 매핑 컨텍스트는 아래와 같이 세팅하면 된다. move에서 W, A 키가 +1 값이라 S, D는 부정 값을 넣어줘야 한다.
헤더파일의 아래쪽에

이런 상속되는 함수들이 있는데, 이 함수들은 엔진에서 플레이를 할 때에 자동으로 호출된다.
NotifyControllerChanged는 캐릭터를 소유하는 Controller가 바뀔 때 자동으로 호출되는데, 엔진 내부 코드에서 호출되는 함수이다. 오버라이드 해서 사용하면 된다.
SetupPlayerInputComponent도 마찬가지로 자동으로 호출되는데, 플레이어가 캐릭터를 조종하는 순간에 호출된다.
cpp 파일을 보면
void AmonsterHunterTutorCharacter::NotifyControllerChanged()
{
	Super::NotifyControllerChanged();

	// Add Input Mapping Context
	if (APlayerController* PlayerController = Cast<APlayerController>(Controller))
	{
		if (UEnhancedInputLocalPlayerSubsystem* Subsystem = ULocalPlayer::GetSubsystem<UEnhancedInputLocalPlayerSubsystem>(PlayerController->GetLocalPlayer()))
		{
			Subsystem->AddMappingContext(DefaultMappingContext, 0);
		}
	}
}
NotifyControllerChanged 에 대한 구현이 있는데, APlayerController* PlayerController = Cast<APlayerController>(Controller)는 캐릭터가 플레이어에게 조종된다면 true를 반환할 것이다.
이때 UEnhancedInputLocalPlayerSubsystem에 LocalPlayer의 Input Subsystem을 할당하고, 전에 헤더파일에서 선언한 DefaultMappingContext를 매핑한다.
다음으로 SetupPlayerInputComponent인데,
void AmonsterHunterTutorCharacter::SetupPlayerInputComponent(UInputComponent* PlayerInputComponent)
{
	// Set up action bindings
	if (UEnhancedInputComponent* EnhancedInputComponent = Cast<UEnhancedInputComponent>(PlayerInputComponent)) {

		// Jumping
		EnhancedInputComponent->BindAction(JumpAction, ETriggerEvent::Started, this, &ACharacter::Jump);
		EnhancedInputComponent->BindAction(JumpAction, ETriggerEvent::Completed, this, &ACharacter::StopJumping);

		// Moving
		EnhancedInputComponent->BindAction(MoveAction, ETriggerEvent::Triggered, this, &AmonsterHunterTutorCharacter::Move);

		// Looking
		EnhancedInputComponent->BindAction(LookAction, ETriggerEvent::Triggered, this, &AmonsterHunterTutorCharacter::Look);
	}
	else
	{
		UE_LOG(LogTemplateCharacter, Error, TEXT("'%s' Failed to find an Enhanced Input component! This template is built to use the Enhanced Input system. If you intend to use the legacy system, then you will need to update this C++ file."), *GetNameSafe(this));
	}
}
PlayerInputComponent의 UEnhancedInputComponent에 이전 헤더 파일에서 선언한 입력 액션들을 바인드하고, Jump, StopJumping, Move, Look 등 함수를 등록한다. (이것들도 따로 선언하고 구현해야 하는 함수들이다. 입력 에셋들에 함수들을 바인딩해주는 과정이다.)
void AmonsterHunterTutorCharacter::Move(const FInputActionValue& Value)
{
	// input is a Vector2D
	FVector2D MovementVector = Value.Get<FVector2D>();

	if (Controller != nullptr)
	{
		// find out which way is forward
		const FRotator Rotation = Controller->GetControlRotation();
		const FRotator YawRotation(0, Rotation.Yaw, 0);

		// get forward vector
		const FVector ForwardDirection = FRotationMatrix(YawRotation).GetUnitAxis(EAxis::X);

		// get right vector
		const FVector RightDirection = FRotationMatrix(YawRotation).GetUnitAxis(EAxis::Y);

		// add movement
		AddMovementInput(ForwardDirection, MovementVector.Y);
		AddMovementInput(RightDirection, MovementVector.X);
	}
}

void AmonsterHunterTutorCharacter::Look(const FInputActionValue& Value)
{
	// input is a Vector2D
	FVector2D LookAxisVector = Value.Get<FVector2D>();

	if (Controller != nullptr)
	{
		// add yaw and pitch input to controller
		AddControllerYawInput(LookAxisVector.X);
		AddControllerPitchInput(LookAxisVector.Y);
	}
}
move와 look 함수는 위와 같다. 대충 보면 해석 가능해서 굳이 설명하진 않겠다. 이러한 방식으로 움직임을 구현하게 되면, 따로 블루프린트에서 이벤트그래프를 수정하지 않아도 해당 클래스를 기반으로 한 캐릭터 블루프린트로 게임을 시작하였을때 입력에 따라 캐릭터를 조작할 수 있다. 이렇게 구현하면 키 설정이나 움직임 등 디테일한 점을 수정하기 쉽고, 플랫폼 별로 (모바일이나 게임패드 등) 입력 분기를 나누기 편리하다.
'언리얼엔진' 카테고리의 다른 글
| Unreal Engine 5 c++ - UPROPERTY와 UFUNCTION (0) | 2026.01.16 |
|---|---|
| 언리얼 엔진 5 실습 2 (0) | 2023.10.17 |
| 언리얼 엔진 5 실습 1 (1) | 2023.10.03 |
| 언리얼엔진 5를 통한 공포게임 개발일지 3 (0) | 2022.12.02 |
| 언리얼엔진 5를 통한 공포게임 개발 일지 2 (0) | 2022.11.09 |